
# Mondo Pin Setup
# Setting up Mondo Pin NTRIP Connection
# 1 Purpose
To provide a guide for setting up Mondo Pin NTRIP connection in your controller controllers.
# 2 Before you Begin
You will require the following before you begin this work process.
# 2.1 Data
- NTRIP IP Address and Port number
- Username and Password for your login\
# 2.2 Software
- Trimble Access
# 2.3 Hardware
- Trimble TSC7 Controller
- Topcon FC-5000 Controller
- CHC Landstart 7 Android App on Android Phone
# 3 Trimble TSC7 Controller
# 3.1 Setting up Survey Style
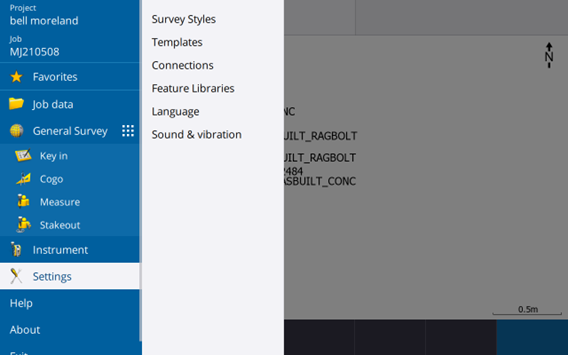
In Trimble Access, click the Hamburger button. Click Settings and then click Survey Style.
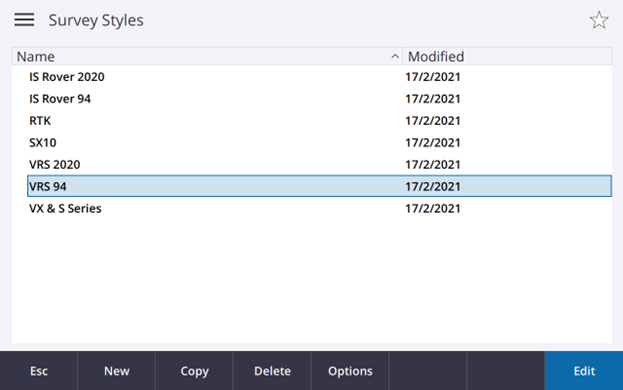
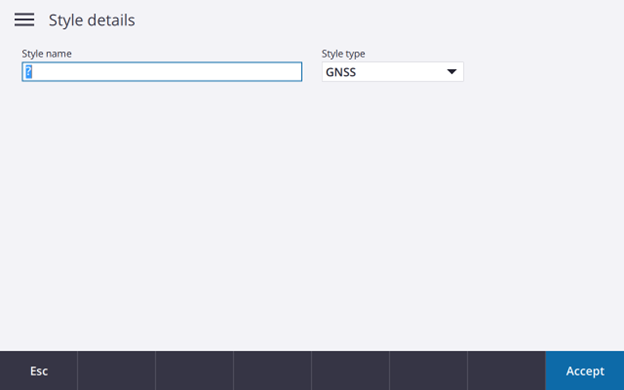
In Survey Styles, press New to add another survey style and call it Mondo Pin with style type GNSS. Click Enter once completed.
# 3.1.1 Rover Options
In the Mondo Pin Style, select Rover Options and click Edit.
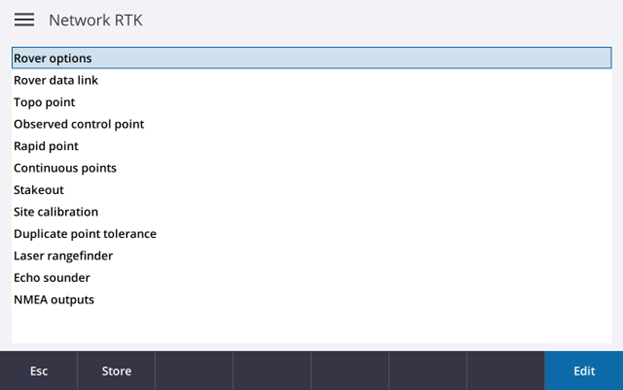
The setting in the rover options are outlined below. Please refer to section 3.1.1.1 for illustration.
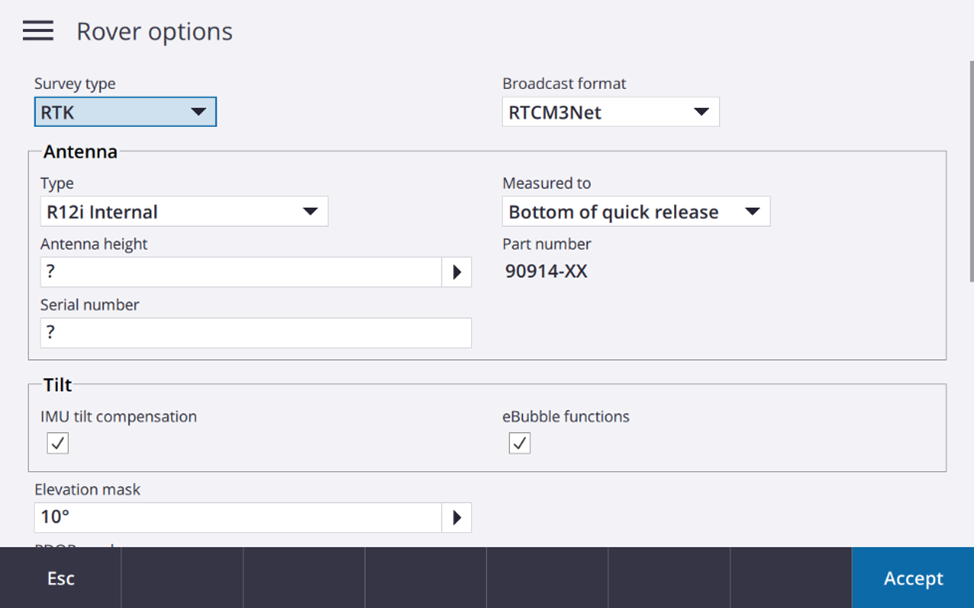
- Survey Type: RTK
- Broadcast Format: RTCM3Net
- Don't worry about the Antenna, Tolt function, Elevation mark and PDOP mask
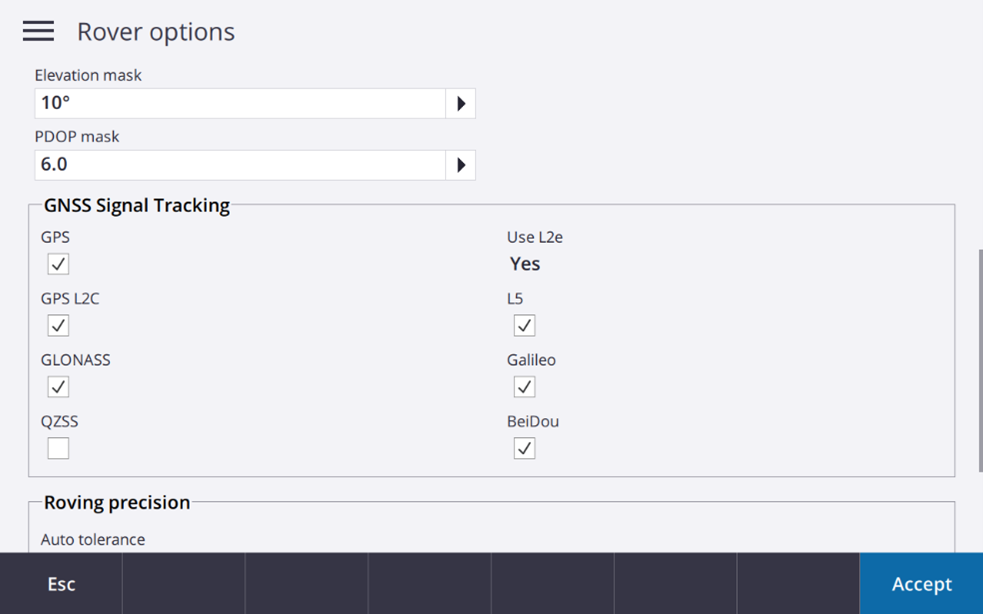
- GNSS Signal Tracking: Tick every box except QZSS
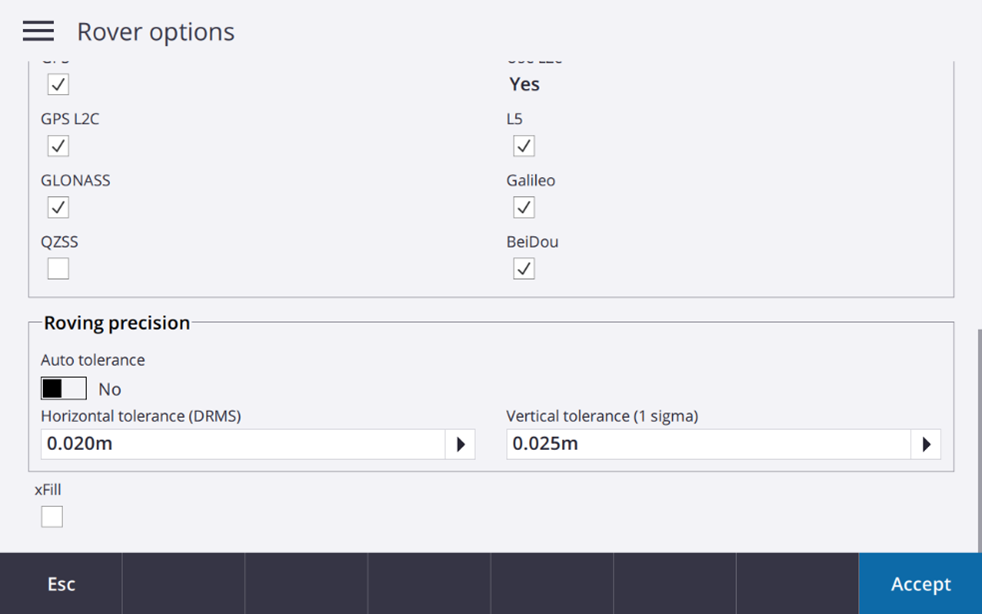
- Rover Precision: Auto Tolerance - No
- Specify Tolerance (Horizontal - 0.020m, Vertical - 0.025)
- xFill: UNTICK
- Click Accept
# 3.1.1.1 Settings in Rover Options
# 3.1.2 Rover Data Link
The next step is to configure the rover data link. Click on Rover data link.
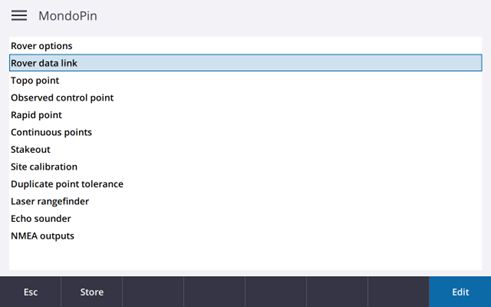
The setting in the rover data link should follow the below format.
- Type: Internet Connection
- Prompt for GNSS contact: TICK
- GNSS Contact: CLick teh arrow pointing to the right

# 3.1.3 GNSS Contact
In GNSS Contacts, select New.
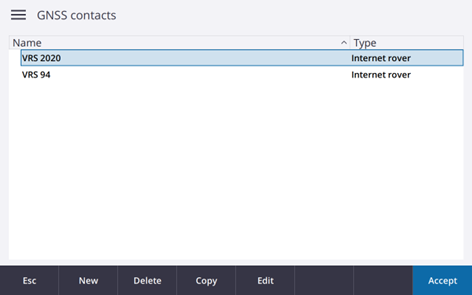
This menu will allow you to input all the information related to Mondo Pin. Please follo the setting outlined below. Please refer to Section 3.1.3.1 for more detail.
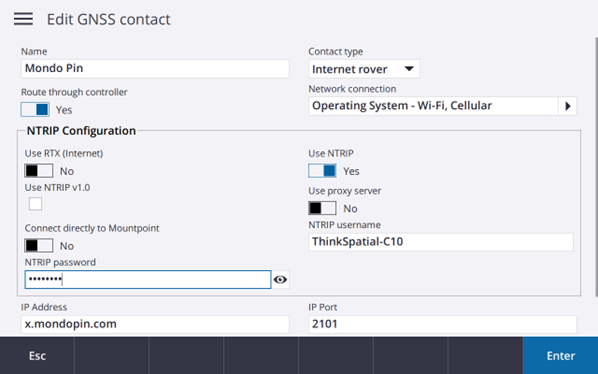
Edit GNSS Contact:
- Name: Mondo Pin
- Contact Type: Internet Rover
- Route through controller: "YES"
- Network Connection: "Operating System - Wi-Fi, Cellular"
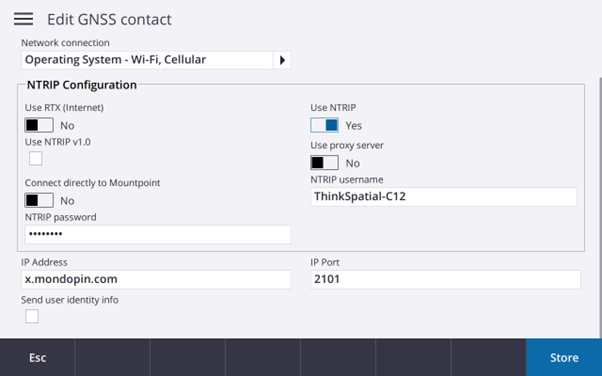
NTRIP COnfiguration:
- Use RTX (Internet): "NO"
- Use NTRIP: "YES"
- Use NTRIP v1.0: UNTICK
- Use proxy server: "NO"
- Connect directly to Mountpoint: "NO"
- NTRIP username: Please refer to your email
- NTRIP password: Please refer to you email
- Click the eye symbol to view your password
- IP Address: x.mondopin.com
- Port: 2102
- Send user identity info: "NO"
- Click Enter then Store
Click Accept twice and click Store (next to Esc Bubtton)
Once this process is completed, you should now be able to access the correction using Mondo Pin.
# 3.1.3.1 Settings in Edit GNSS Contact
# 4 Topcon FC-5000 Controller
# 4.1 Setup Radios
One the main page, select Setup, then Radios....
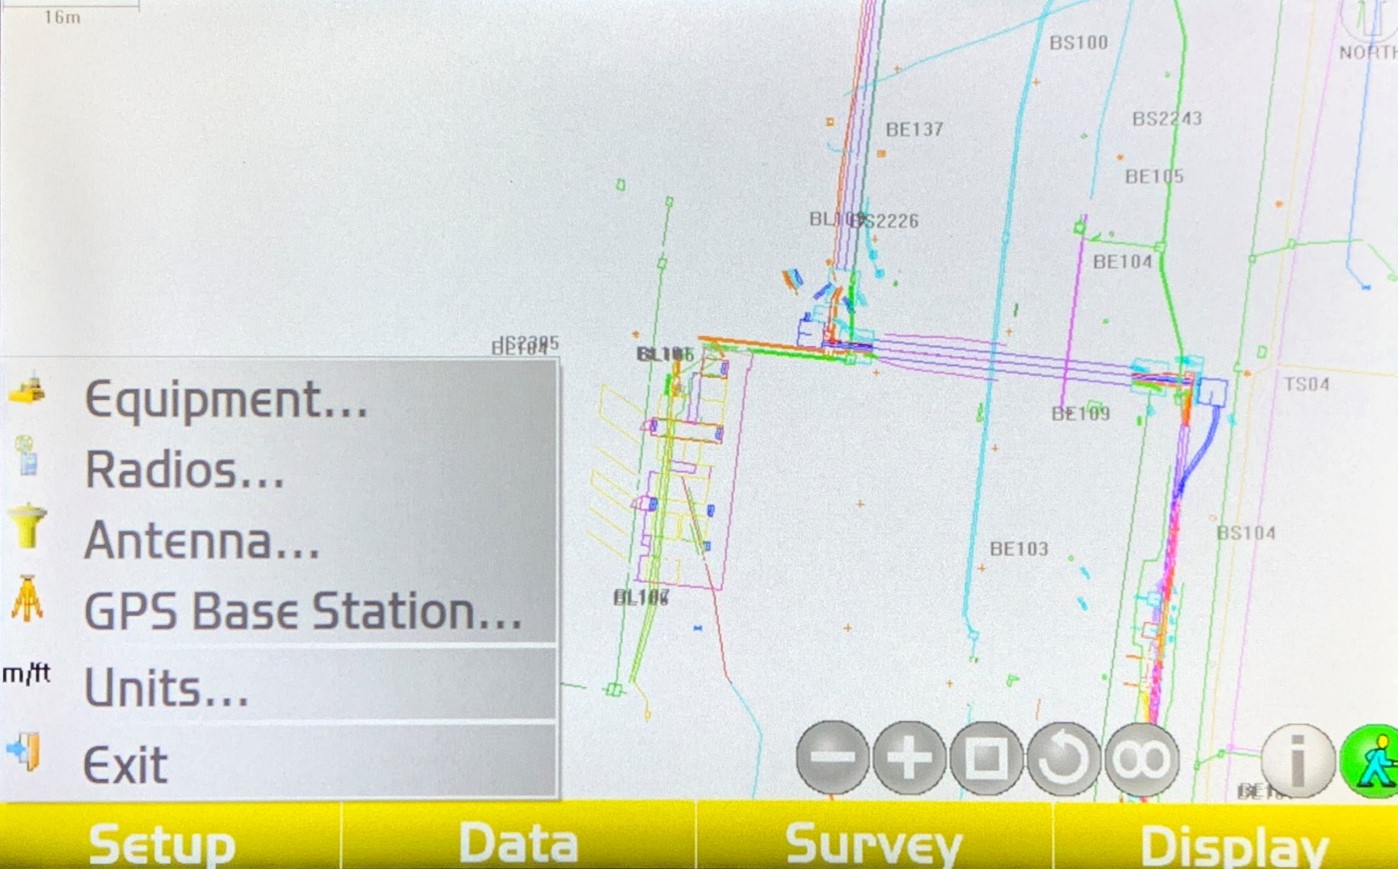
A pop-up window will appear. Please input the following settings.

- Radio Type: Direct Network Connection
- Port: n/a
- Baud Rate: n/a
- Format: n/a
- IP/Port: Select an empty IP/Port (0.0.0.0/0)
# 4.2 Setup IP/Port
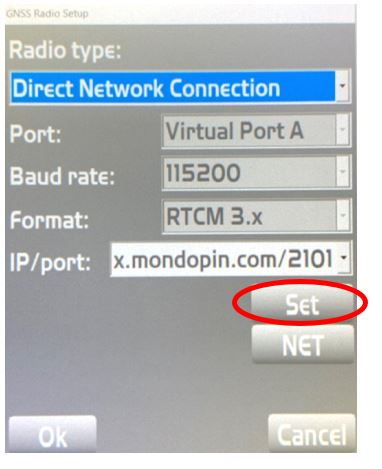
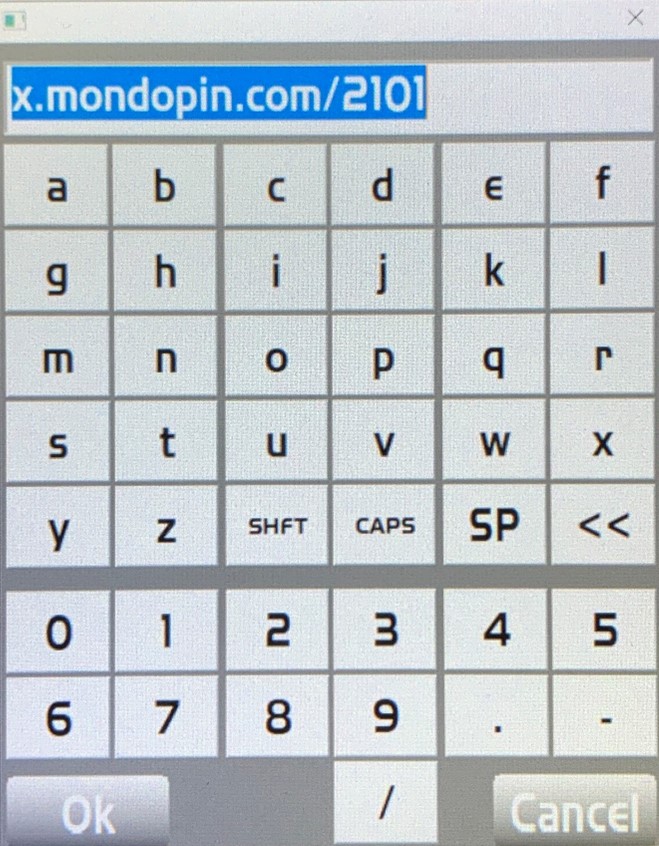
In GNSS Radio Setup, select Set to access the setting IP/Port. Please tyoe in the following address and port to access Mondo Pin NTRIP Connection.
x.monodopin.com/2101
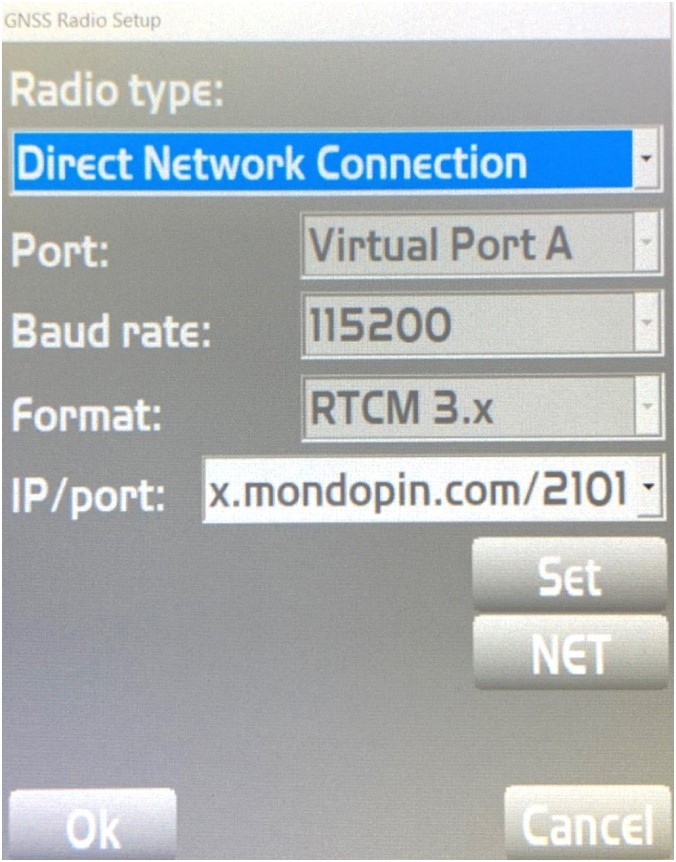
# 4.3 Setup Network Corrections
Back in the GNSS Radio Setup, select NET to access the Network Corrections settings.
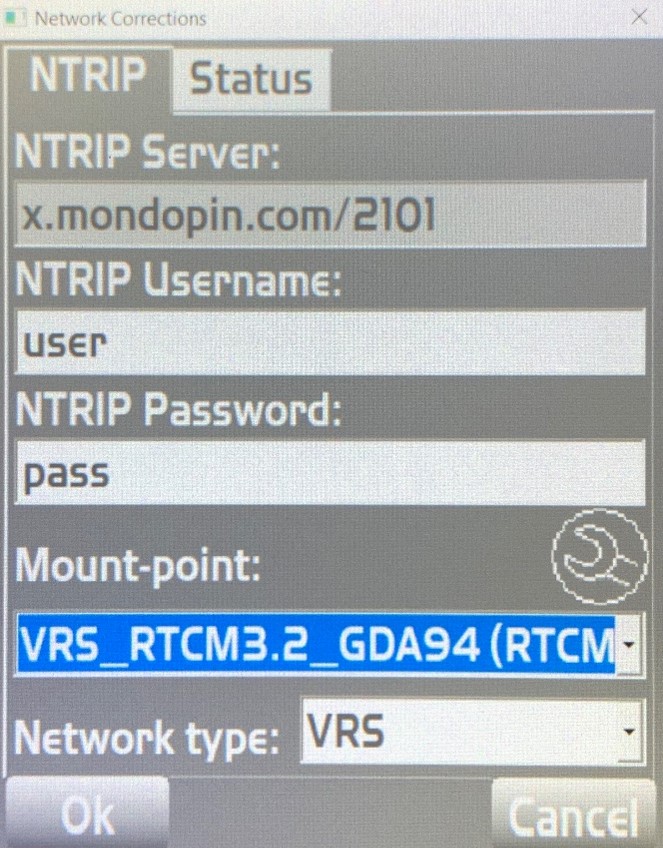
- NTRIP Username: Please refer to your email
- NTRIP Password: Please refer to your email
- Mount-Point: Select the circular spanner symbol to access the list of mountpoints. On the drop down list, please select the desired mountpoint.
- VRS_RTCM3.2_GDA94 - Use this mountpoint for GDA94 correction
- VRS_RTCM3.2_GDA2020 - Use this mountpoint for GDA 2020 correction
- Network type: VRS
# 3.1.3.1 Settings in Edit GNSS Contact
# 4 Topcon FC-5000 Controller
# 4.1 Setup Radios
One the main page, select Setup, then Radios....
A pop-up window will appear. Please input the following settings.
- Radio Type: Direct Network Connection
- Port: n/a
- Baud Rate: n/a
- Format: n/a
- IP/Port: Select an empty IP/Port (0.0.0.0/0)
# 4.2 Setup IP/Port
In GNSS Radio Setup, select Set to access the setting IP/Port. Please tyoe in the following address and port to access Mondo Pin NTRIP Connection.
x.monodopin.com/2101
# 4.3 Setup Network Corrections
Back in the GNSS Radio Setup, select NET to access the Network Corrections settings.
- NTRIP Username: Please refer to your email
- NTRIP Password: Please refer to your email
- Mount-Point: Select the circular spanner symbol to access the list of mountpoints. On the drop down list, please select the desired mountpoint.
- VRS_RTCM3.2_GDA94 - Use this mountpoint for GDA94 correction
- VRS_RTCM3.2_GDA2020 - Use this mountpoint for GDA 2020 correction
- Network type: VRS
# 5 Landstar Android App
# 5.1 Creating a New Work Mode
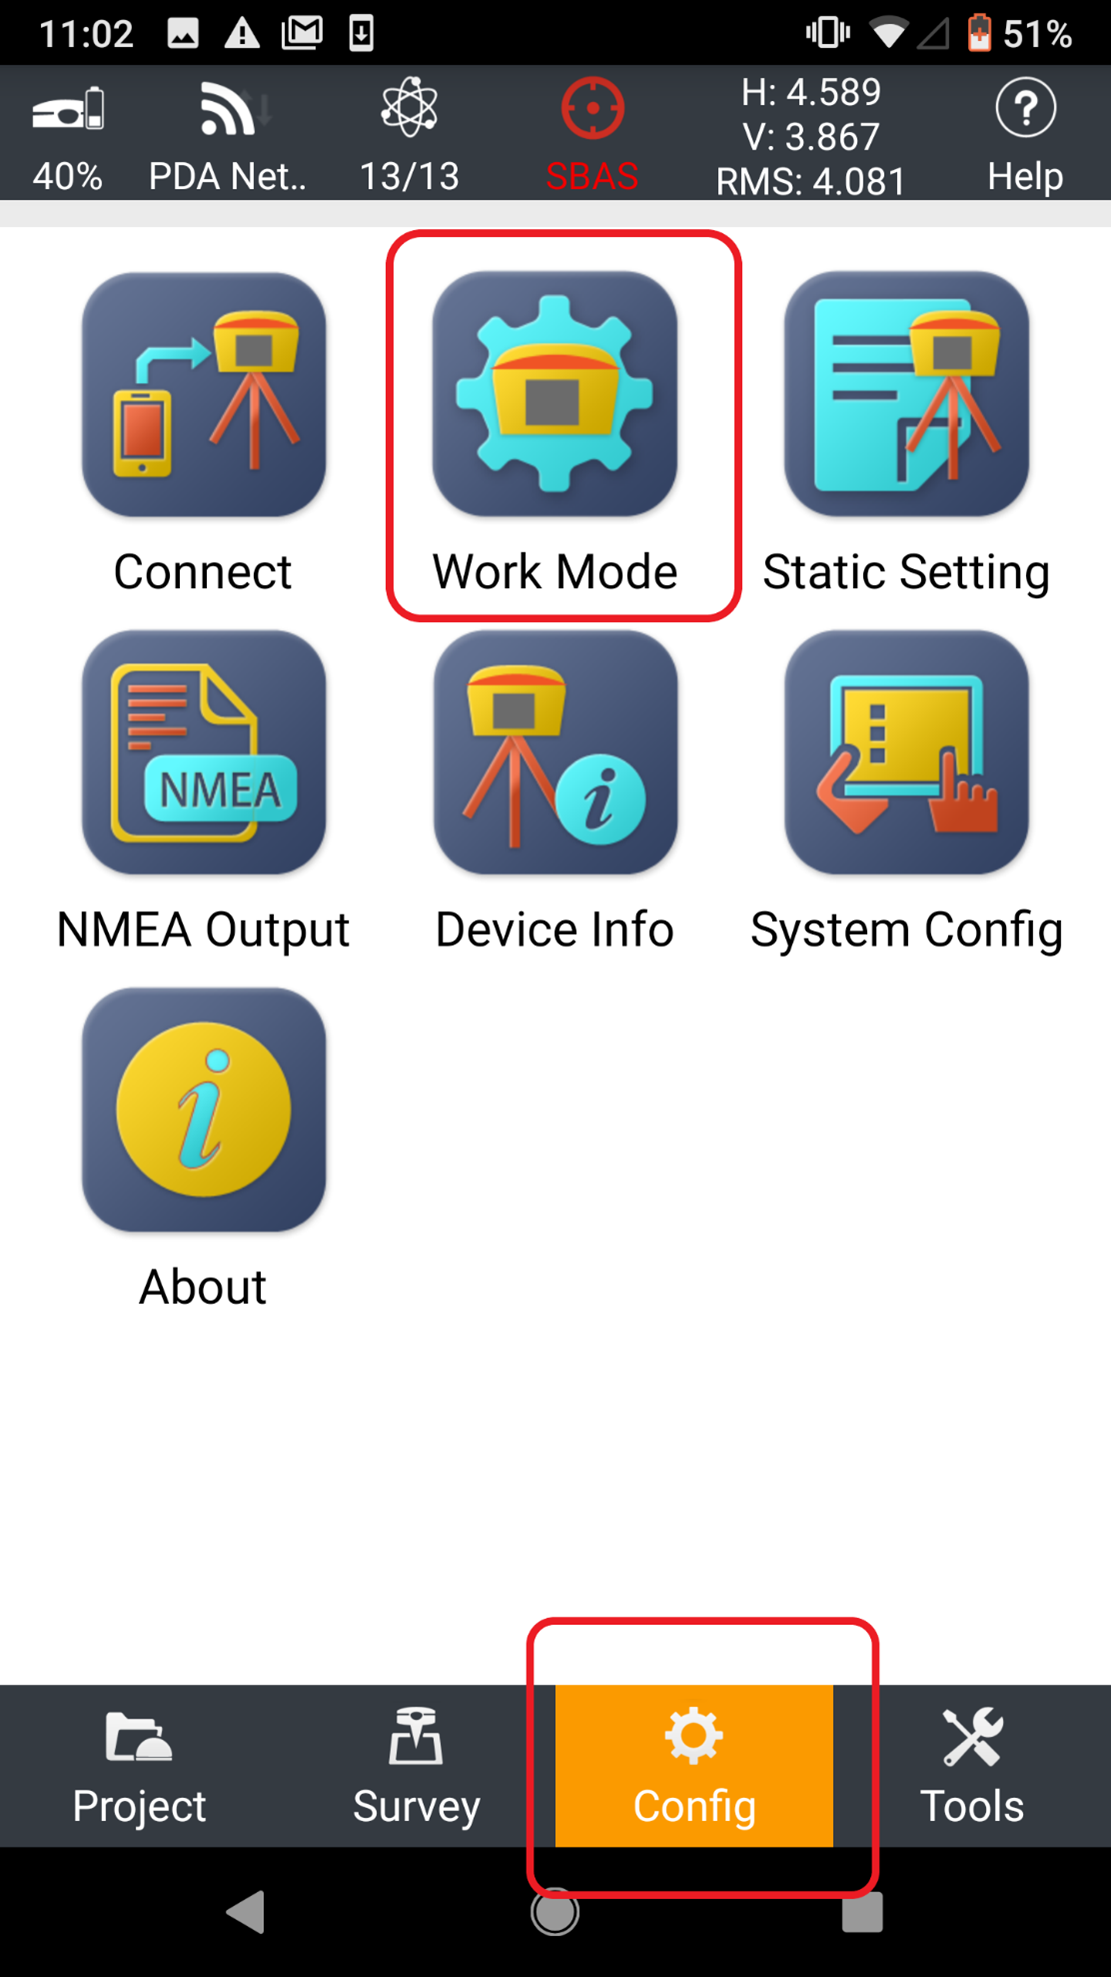
In Landstar 7, click on the Config icon and then click the Work Mode icon.
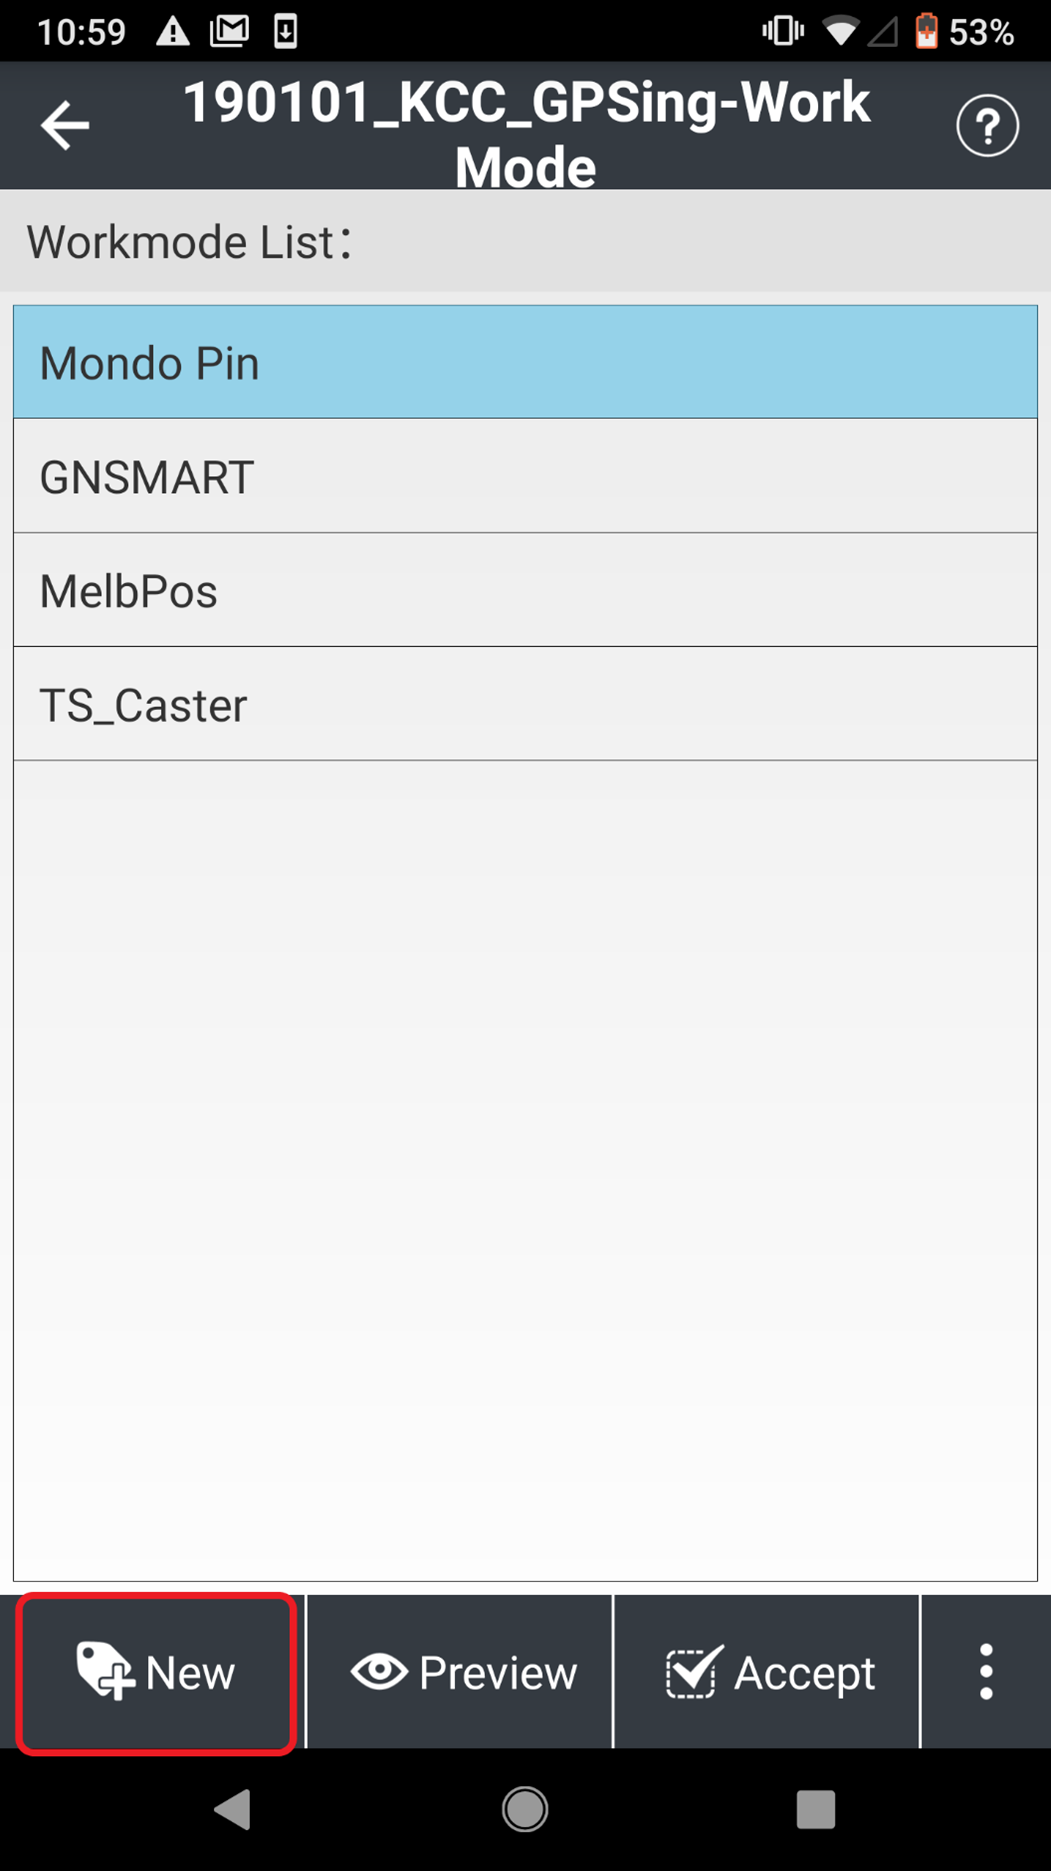
Select New
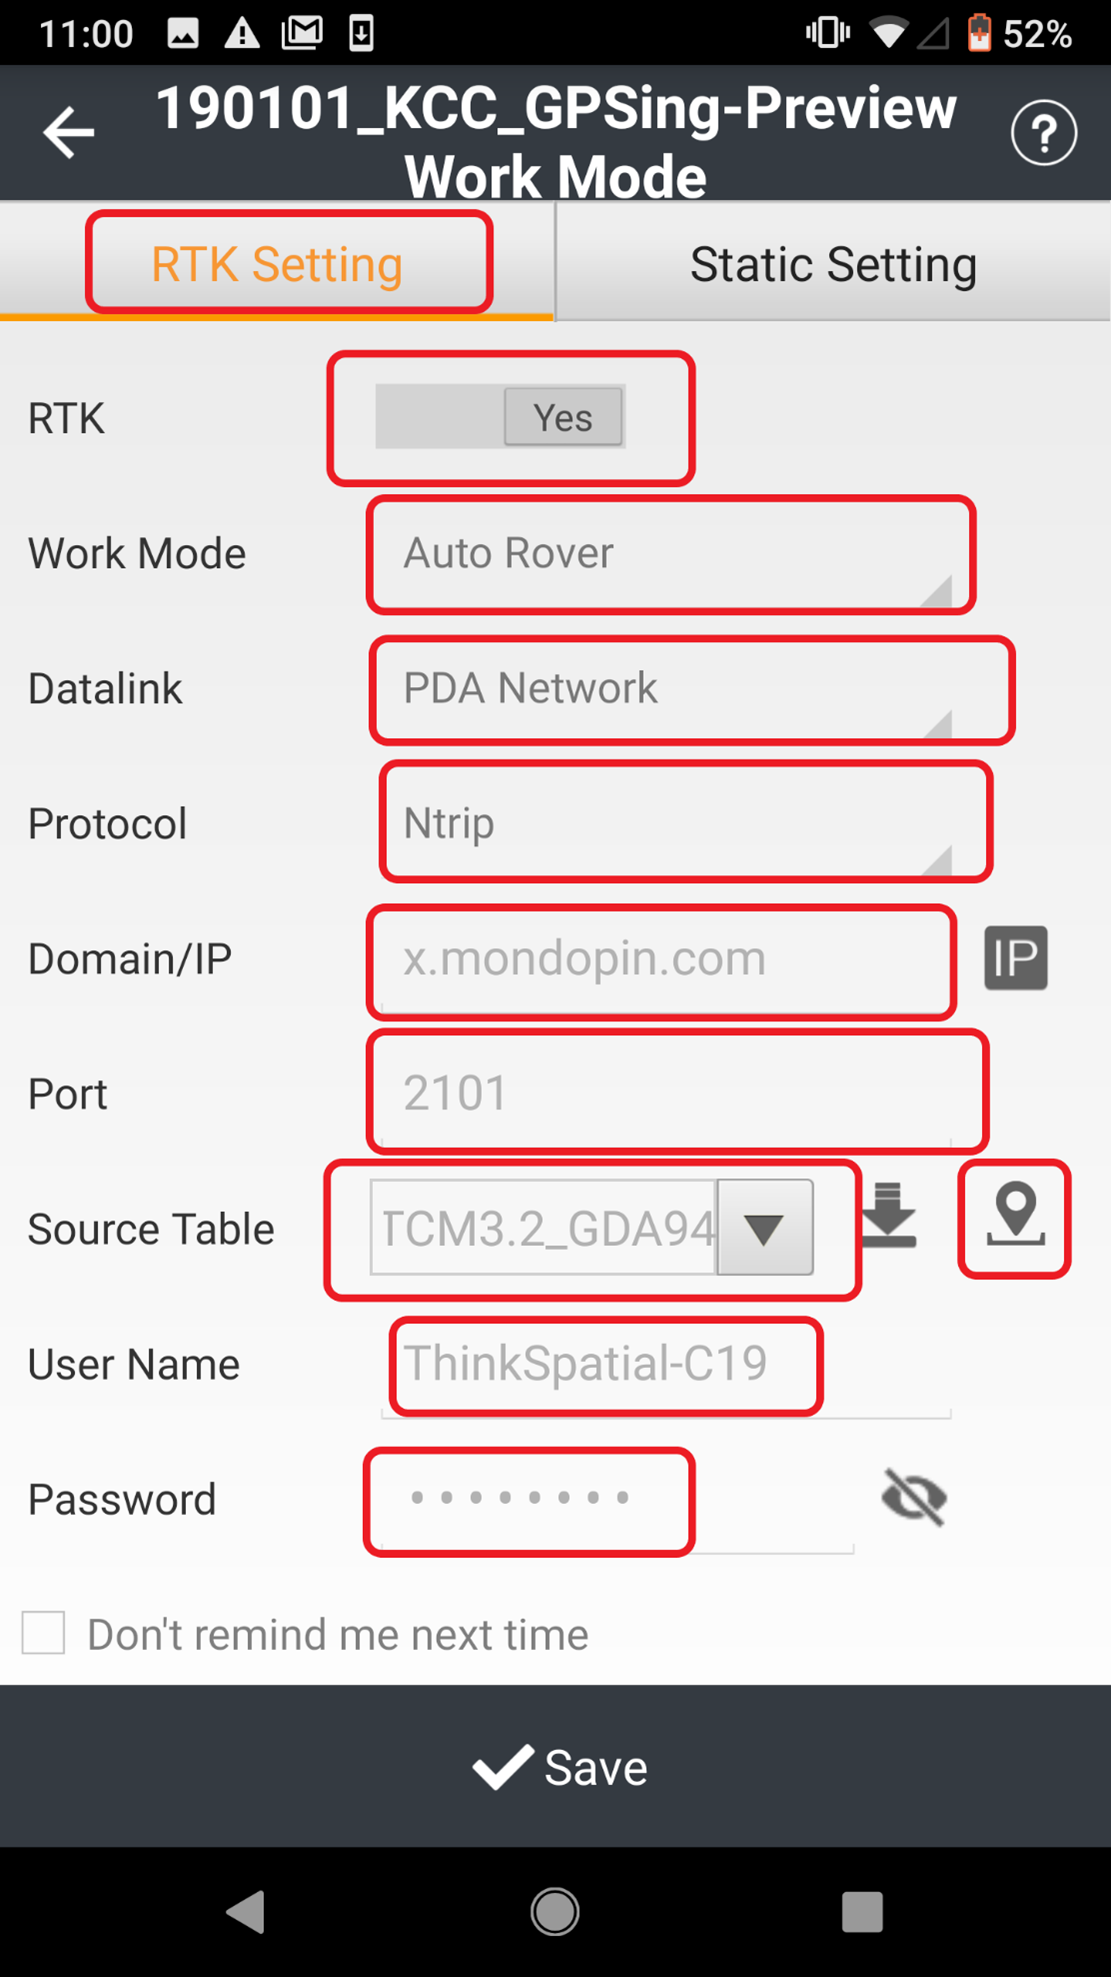
The settings in the new work mode are outlined below:
- RTK: Yes
- Work Mode: Auto Rover
- Datalink: PDA Network
- Protocol: NTRIP
- Domain/IP: x.mondopin.com
- PORT: 2101
- Source Table: VRS_TRCM3.2_GDA94
- Username: Please refer to your email
- Password: Please refer to your email
- 1021-1022: NO
- 1023-1024: NO
- 1025-1027: NO
- Save Password: YES
- Auto Login: YES
- USE VRS: YES
TIP
Don't worry about BaseID, Elevation Mask, PDOP Limit, RTK FREQ, Safe Mode, Ionosphere Model, BaseChanged
Click Save Click OK
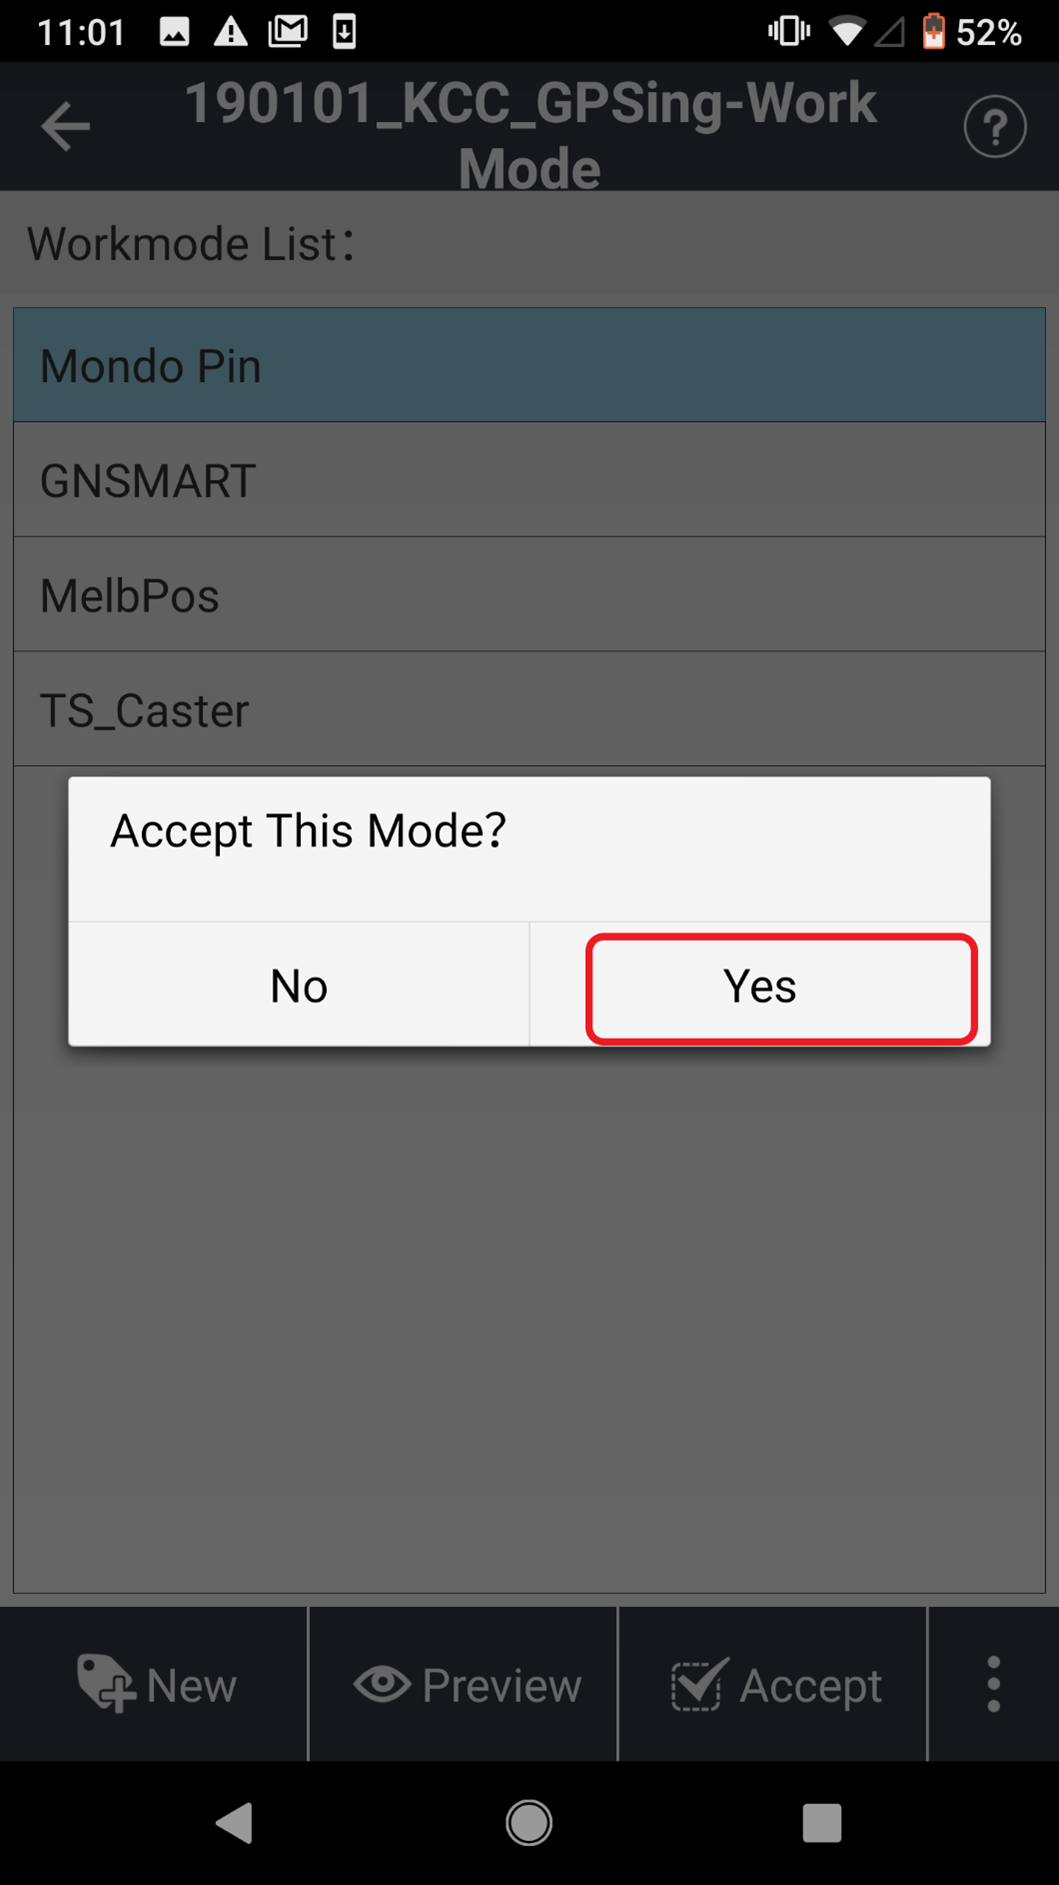
# 5.2 Selecting Mondo Pin Work Mode
Select Mondo Pin from the work mdoe list and click the Accept icon, Click Yes

Recheck the Username and Password, if they're correct click ok
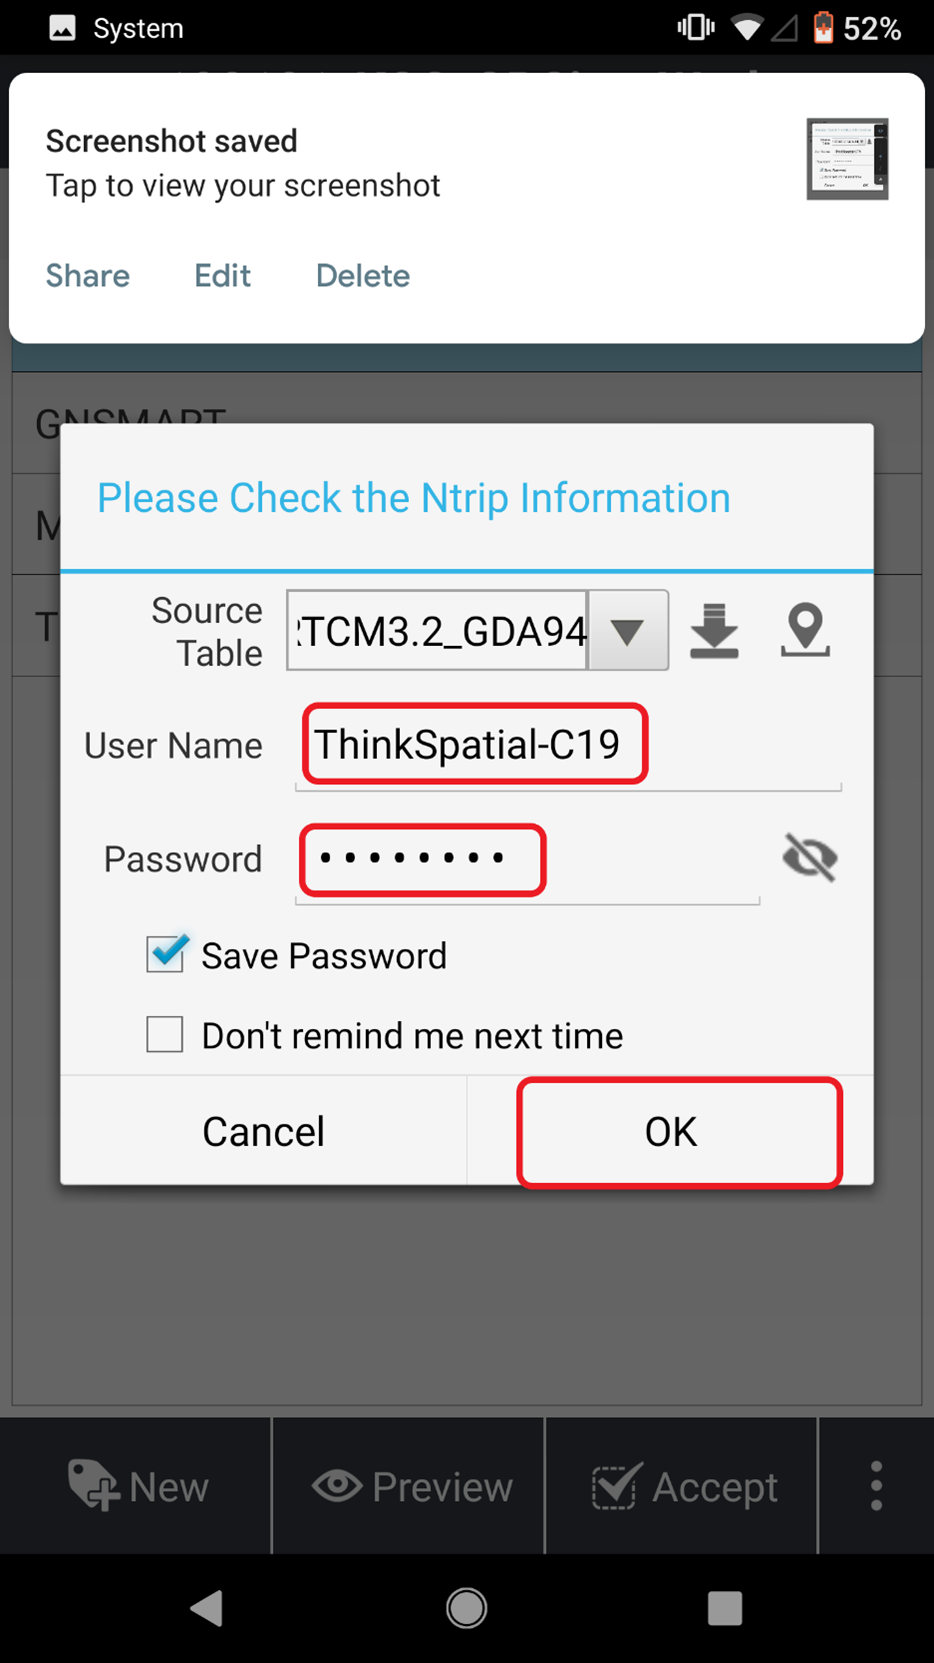
If everything was entered correctly, there will be a message sayting "Ntrip Login Successful", click the back icon. Once this process is completed, you should now be able to access the corretion using Mondo Pin.
